How to Hang Wallpaper

Everything you’ll need to help you hang wallpaper like a professional
Tools for hanging wallpaper
Tape Measure • Level (or Plumb Bob) • Pencil • Ruler or Straight Edge or spirit level • Utility Knife • Wallpaper brush • Step Stool or Step Ladder • Adhesive paste • Sponge roller • Sponge and bucket of water
How to paste your wallpaper
When using your wallpaper paste, make sure you have read the label fully and always follow the guidelines to make it up so you don’t find yourself in a sticky situation.
You will need
Wallpaper paste • Wallpaper pasting brush • Pasting table • Smoothing brush • Cutting blade or scissors • Bowl or bucket for the paste • Sponge • Protective gloves • Water trough • Roller
How to prepare for wallpaper
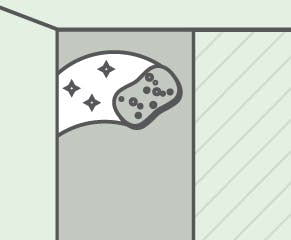
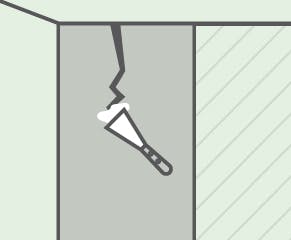
It’s well worth preparing your walls thoroughly before trying to hang wallpaper to help avoid unwanted lumps, bumps and bubbles that could impact your final look. Follow these steps to create the best surface for your new wallpaper.
Once you’ve decided on the design for you, it’s time to prepare the walls and hang your wallpaper. This guide will give you the know-how you need to get the best finish possible by sorting out those surfaces and applying your new look smoothly.
General preparation tips
• If you’ve been painting in the room recently, make sure it is dry before you start papering.
• Move your furniture into the centre of the room and cover what you can with dust sheets, including the floor.
• Check each wallpaper roll has the same batch or shade codes and that the product reference numbers are the same.
Use lining paper before wallpapering
Paper lining can be applied to your walls before you hang your wallpaper to create a more even surface. It’s perfect for older buildings and is sold in different thicknesses rated by GSM. Here’s how to line your walls:
1. Measure the length of the wall and cut your lining paper to size, adding 2.5cm for the corners.
2. With a spirit level and a pencil, mark a horizontal line along the wall around 2.5cm lower than where your first strip will be hung (e.g. 2.5cm from the ceiling).
3. Paste the length of the lining paper and fold into a concertina.
4. Apply your paper to the wall starting at the corner – holding it so it will roll out horizontally – and unfold each section, smoothing as you go.
5. Continue to follow your pencil line.
6. Work from the ceiling to the floor and allow the lining paper to completely dry before applying wallpaper.
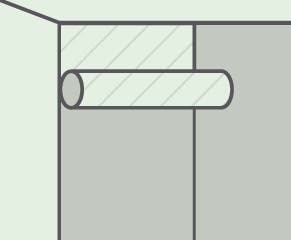
Start by wallpapering the ceiling
If you have decided on wallpapering your ceiling as well, it’s best to start here before going on to the walls so you can achieve a more professional finish.
1. With a pencil and a long spirit level, draw a guide line on the ceiling at a 90° angle to the adjacent wall. The mark should be around 1.3cm less than the width of the paper out from the wall.
2. Prepare your wallpaper as per its instructions (soak or paste the paper or apply paste directly to the ceiling).
3. Concertina your paper and when it is ready, prop the end of the wallpaper up with a broom handle or something similar.
4. Carefully unfold the first part of your concertina and place it into position with the edge of the paper on the guide line.
5. Continue to unfold and smooth the paper as your work your way across the ceiling with a brush.
6. Trim the strip once it is in place, leaving an overlap of 1.3cm at the end.
7. Continue with the remaining lengths, making sure they don’t overlap.
How to cut wallpaper
Avoid any accidental snips with these helpful tips. First off, make sure you have a measuring tape and sharp pair of wallpaper scissors - then you can go ahead and:
1. Measure the height of your wall and add an extra 10cm on to the measurement to allow for neat trimming.
2. Cut your first strip with wallpaper scissors.
3. Use your first strip as a length guide to cut any further pieces needed. If you have a patterned design, line it up with the previous strip before cutting.
4. Mark the back of each wallpaper strip with ‘top’ to avoid mistakes during hanging.
How to hang wallpaper
You’ve measured the wall, cut your first strip and are ready to start hanging your wallpaper. Whatever happens, take your time. The extra care you take when putting it up will help keep it straight, bubble-free, and longer-lasting.
Decide where to start wallpapering
Where to hang that first panel will depend on the design of your wallpaper has. So what style have you chosen?
• If your wallpaper has a big pattern or bold features, start at the centre of the wall.
• For less detailed wallpapers, start from the corner or behind a door.
• Make sure you match up the design on the wallpaper with the following strips.
• Keep any wallpaper cuttings for above the doors and windows.
How to Get a Straight Edge When Wallpapering
Most walls are not symmetrical, so getting that first wallpaper strip on straight is not as easy as following the line of a corner or doorframe. Thankfully a simple piece of kit called a plumb line (a weight at the end of a string) makes it easy to see the angle at which your first pieces needs to go, and from there on the other pieces should follow on naturally (and more importantly, perfectly vertically).
1. Suspend the unweighted end of the string from a pin or nail at the top of the wall.
2. The string should be long enough to cover most of the wall without touching the floor or any surfaces.
3. Lower the line gently until the weight hangs freely and wait for it to settle into position.
4. Push the bottom of the string into the wall and use a soft pencil to mark the line.
Alternatively, you can run coloured chalk along the length of the string to mark the wall.
How to paste your wallpaper
1. Wear protective gloves to help prevent the paste causing skin irritations.
2. Place your wallpaper face down on a clean pasting table or flat surface.
3. Using your pasting brush, paste along the centre of the strip first and then along the edges using outward brushstrokes to ensure paste doesn’t collect on the reverse side. If paste starts to collect on the patterned side, wipe it away with a sponge right away.
4. Fold each end of the strip towards the centre, or in a concertina if it’s very long.
5. Leave the pasted strip to soak for the instructed time so the paper can absorb the adhesive and expand, to avoid blistering when hanging.
How to hang ‘paste the paper’ wallpaper
1. Before you start, make sure that you know where the top of the wallpaper strip is.
2. Open the first fold of the wallpaper and place the top of it gently in place on the wall.
3. Slide it into position until you are happy, leaving a 5cm overlap at the top so you can neatly cut it later on.
4. Gently smooth down the middle with a wallpaper brush to help remove blisters and bubbles.
5. Unfold the next section of paper and continue to use the brush to smooth it down the wall. You should have a 5cm overlap at the bottom.
6. Gently score and trim the top and bottom overlaps before smoothing the paper back down against the wall.
7. Sponge away any excess paste on the wallpaper.
How to hang ‘paste the wall’ wallpaper
If your wallpaper directs you to paste the wall rather than the paper, use a roller to apply the specially formulated ‘paste the wall’ adhesive and gently apply the pre-cut lengths. Follow the directions above to smooth the paper out and remove excess paste.
How to hang ready-pasted wallpaper
Some wallpapers come pre-pasted so instead of applying paste, you need to submerge your strips into cold water before applying.
1. Cut your wallpaper to size following the guidance above.
2. Fill your water trough with cold water and place it close to the wall you are papering.
3. Loosely roll the cut wallpaper length – paste side out – and immerse into the trough for the recommended amount of time.
4. Use both hands to lift the paper out of the trough and allow excess water to drip off.
5. Apply the wallpaper on the wall just as you would with other wallpaper types, using a clean sponge to smooth away bubbles working from the middle outwards.
6. Wipe away excess paste at the seams with a damp cloth.
7. Trim the edges and continue with further lengths (ensuring your water is kept topped up).
How to Get Rid of Bubbles in Wallpaper
Sometimes blisters will appear as the wallpaper dries, no matter how much smoothing you did. Don’t worry though, all is not lost. If blisters show up, take action right away before the wallpaper completely dries, and simply lift the paper gently and smooth out the trapped bubbles. If you try this and still find bubbles appearing, it could be because:
• The pasted paper did not have enough time to soak at the start and is still expanding.
• The paste was too thin or thick.
• Some of the paper did not get pasted.
• The wall surface needs more preparation (e.g. it needs ‘sizing’ with a thin layer of wallpaper paste).
How to Wallpaper Corners
When it comes to corners don’t be tempted to use one strip of wallpaper, instead use two lengths for the neatest finish.
1. Carefully measure from the edge of the last piece of wallpaper making sure to measure at several points, as most walls aren’t 100% vertically straight.
2. Add on 1cm (or a little more if the plastering is uneven) to create an overlap that will cover the inside of the corner.
3. Measure the next strip, allowing for uneven plastering again, and draw a vertical line in pencil at a slightly broader width.
4. Apply paste to this strip and place it parallel to the guide line, without covering it.
5. Smooth down the paper and brush into the corner so it overlaps the wallpaper your carried round the bend.
Top tips
• If you are using thick wallpaper, it can be harder to overlap so gently slice through the two overlapping pieces and remove some of the paper.
• Allow for 5cm overlap on outside corners such as chimney breasts.
• Shiny surfaces or flat vinyl might require overlap adhesive to stick.
How to Wallpaper Around a Light Switch
If the wall you are papering has a light switch or electricity point, ensure you turn off the electricity supply to the room before you start. There are a couple of ways you can go about getting a neat finish so pick the right one for you.
• If your light switch is square, cover it lightly with the paper before making a hole and cutting four diagonal lines from the centre to the switch corners. Gently smooth the paper into place and trim away the excess for a smooth finish.
• If your light switch is circular, follow the same process as the square switches but cut a star shape instead.
• You could also unscrew the fitting and neatly cutting the edges. Make sure the electricity supply has been turned off before you try this though. Once you’ve done, the edges can be tucked in before you re-attach the fitting.
How to Wallpaper in a Window Recess
Hanging wallpaper in recessed windows or arches might seem a little daunting, but there’s a simple process to get that neat finish you want.
1. Hang your wallpaper strip into the recess, making neat cuts along the top and bottom to allow for the paper to be smoothed into the recess.
2. Take a strip of paper, start from the ceiling and butt join it into the recess above the window. Continue until you reach the end of the window.
3. Cut two pieces of wallpaper slightly larger than the gaps at the top of the recess, making sure the patterns match.
4. Gently pull away the hanging strip and place your cutting in place before smoothing in all down.
Arches
1. Paper up to and over the arch as you would with a window.
2. Trim around the shape of the arch leaving a 2.5cm – 4cm overhang.
3. Cut small triangles into the overhanging paper to form a series of wedges that can neatly be folded back into the arch.
How to Wallpaper Behind a Radiator
In an ideal world you would be able to remove a radiator to wallpaper behind it, but this is not always possible or practical. If you cannot remove the radiator from the wall, ensure that it has been turned off and is cool before you start.
1. Measure the positions of the radiator brackets on the wall and transfer them onto the wallpaper.
2. Cut the wallpaper from the bottom to the top of the brackets to allow the paper to slide down either side of the bracket.
3. Press down the wallpaper with a slim wallpaper roller, then score and trim by the skirting board.
More Help & Advice

